
Research | April 28th, 2026
Types of Hydroponic Systems Explained for Beginners
By Nicholas Peacock
Types of Hydroponic Systems
A practical guide to choosing your first soilless growing system
So you’ve heard about hydroponics and you’re curious. Maybe a friend showed you their countertop lettuce setup, or you stumbled across a video of someone growing tomatoes in a bucket with no soil in sight. Either way, you’re wondering: how does this actually work, and which system is right for someone just getting started?
You’re in the right place. In this article, we’ll walk through the main types of hydroponic systems, break down how each one works in plain language, and help you figure out which one makes the most sense for your space, your budget, and your comfort level. No engineering degree required.
What Is Hydroponics, Exactly?
Before we get into the different systems, let’s cover the basics. Hydroponics is simply a way of growing plants without soil. Instead of pulling nutrients from the ground, plants get everything they need from a water-based nutrient solution that’s delivered directly to their roots.
The word itself comes from the Greek words for “water” and “labor,” which is a pretty fitting description.
The cool thing is that because plants don’t have to work as hard to find food (it’s being handed right to them), they tend to grow faster. We’re talking 30 to 50 percent faster than traditional soil gardening in many cases. Hydroponic setups also use up to 90 percent less water, which is a big deal for sustainability-minded growers.
Now, here’s where things get interesting. There isn’t just one way to do hydroponics. There are actually several different system types, and each one delivers water and nutrients to the roots in a slightly different way. Let’s go through them one by one.
1. Deep Water Culture (DWC)
Deep Water Culture is often the first system beginners hear about, and for good reason. It’s simple, affordable, and surprisingly effective.
How it works: Your plants sit in net pots (small mesh containers) that are placed into a lid or floating platform above a reservoir filled with nutrient-rich water. The roots dangle directly into the solution. An air pump connected to an air stone bubbles oxygen into the water, which keeps the roots healthy and prevents them from drowning. Think of it like a fish tank for your plants.
Best for: Lettuce, basil, kale, spinach, and other leafy greens. With proper support, you can also grow tomatoes and peppers.
Why beginners love it: A basic DWC system can be built for under $20 using a five-gallon bucket, an air pump, an air stone, and a net pot. There aren’t a lot of moving parts, and once it’s set up, it doesn’t need much fiddling.
Watch out for: Water temperature and pH can fluctuate, so check on those regularly. If you lose power, your air pump stops and roots lose their oxygen supply.
Difficulty level: Beginner-friendly.
2. The Kratky Method
If DWC is the simplest active hydroponic system, the Kratky method is the simplest hydroponic system, period. It’s completely passive, meaning there are no pumps, no electricity, and no timers involved. It was developed by Bernard Kratky, a researcher at the University of Hawaii, and it’s about as close to “set it and forget it” as hydroponics gets.
How it works: You fill a container (a bucket, a mason jar, even a plastic storage bin) with a nutrient solution and place a plant in a net pot in the lid. The bottom of the net pot sits just below the surface of the water at first. As the plant drinks up the solution over time, the water level drops, creating an air gap. The roots exposed to air absorb oxygen, while the roots still touching the water absorb nutrients. That’s it. No refilling, no adjusting.
Best for: Leafy greens like lettuce and spinach, herbs like basil and mint, and other fast-growing crops with short growth cycles.
Why beginners love it: There’s virtually no equipment cost and zero ongoing electricity expense. It’s perfect for a kitchen windowsill experiment or a classroom project.
Watch out for: This method works best for smaller plants with shorter life cycles. Bigger, fruit-bearing plants need larger containers and more careful nutrient monitoring. Use an opaque container to block light and prevent algae growth.
Difficulty level: As beginner-friendly as it gets.
3. Wick System
The wick system is another passive option that’s been around for a long time. It’s low-tech, quiet, and doesn’t need electricity to run. If the Kratky method is the laziest hydroponic system (in the best way), the wick system is a close second.
How it works: Plants sit in a container filled with a growing medium like perlite, vermiculite, or coconut coir. A wick (usually a piece of cotton rope or felt strip) runs from the nutrient reservoir below up into the growing medium. The wick draws the nutrient solution upward through capillary action, kind of like how a paper towel soaks up a spill.
Best for: Small herbs, lettuce, and other lightweight plants that don’t drink a ton of water.
Why beginners love it: It can be assembled from things you probably already have at home. An old container, some string, a bit of perlite, and you’re in business. No moving parts, no noise, no electricity bill.
Watch out for: The wick can only deliver so much nutrient solution at a time, which means this system isn’t ideal for larger or thirstier plants. Growth rates tend to be a bit slower compared to active systems.
Difficulty level: Beginner-friendly.
4. Nutrient Film Technique (NFT)
Now we’re stepping up to a slightly more involved system. NFT is popular in both home setups and commercial farms, especially for growing herbs and leafy greens.
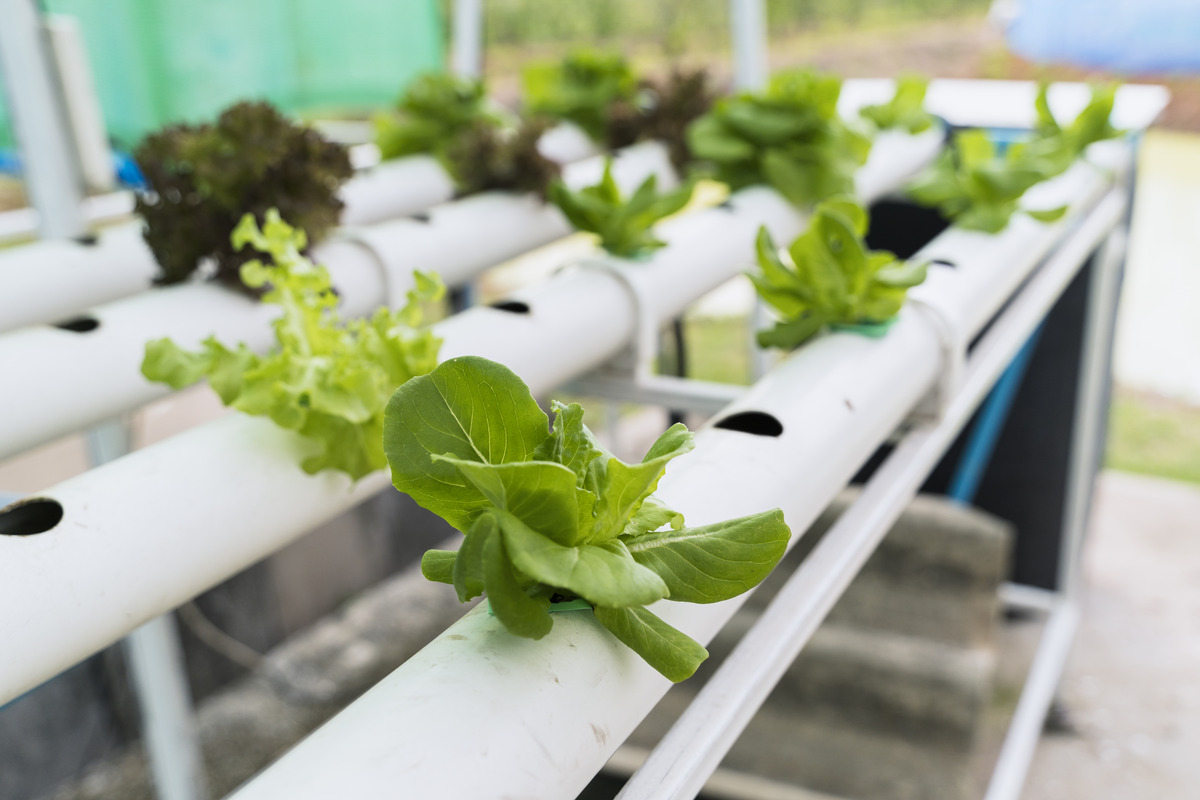
How it works: Plants are placed in net pots inside a slightly sloped channel or tube. A pump sends a thin, continuous stream of nutrient solution from a reservoir through the channel, flowing over the bottom of the roots like a shallow river. The excess flows back into the reservoir and gets recirculated. You only want a thin layer of solution coating the bottom of the channel, not a deep pool.
Best for: Lettuce, basil, arugula, mint, and other fast-growing greens and herbs with smaller root systems.
Why people like it: It’s very water-efficient since the solution constantly recirculates. It’s also easy to scale by simply adding more channels.
Watch out for: If the pump fails, the thin film of water dries up fast, and roots can start dying within hours. It’s also not a great choice for heavy plants or crops with large root systems, since the roots can clog the channels.
Difficulty level: Intermediate. Great as a second system after you’ve gotten comfortable with DWC or Kratky.
5. Ebb and Flow (Flood and Drain)
Ebb and flow is one of the most versatile hydroponic systems out there. It’s a favorite among intermediate growers because it supports a wider variety of plants than many other setups.
How it works: Plants sit in a grow tray filled with a growing medium (like clay pebbles or rockwool). On a timer-controlled schedule, a pump floods the grow tray with nutrient solution from a reservoir below. The solution soaks the roots and the growing medium. After a few minutes, the pump shuts off and the solution drains back by gravity. This cycle happens multiple times a day.
Best for: A wide range of plants, including both leafy greens and larger fruiting plants like tomatoes and peppers.
Why people like it: It’s flexible, energy-efficient (the pump only runs for short intervals, typically 40 to 80 minutes per day total), and gives you a lot of control over your plants’ feeding schedule.
Watch out for: If the pump or timer fails, your plants won’t get fed. The system also has more components than DWC, so there’s a bit more that can go wrong. Change the nutrient solution every one to two weeks.
Difficulty level: Intermediate.
6. Drip System
Drip systems are the most widely used hydroponic method in commercial operations worldwide, and they work well at the home scale too. If you’ve ever seen a garden with little tubes running to each plant, that’s essentially what this is.
How it works: A pump sends nutrient solution from a reservoir through a network of tubes. Each tube has an emitter positioned at the base of each plant. The solution slowly drips onto the growing medium around the roots. In a recovery system, excess solution drains back into the reservoir for reuse.
Best for: Larger plants, fruiting crops, and situations where you want precise control over how much each plant is getting.
Why people like it: You can customize the flow rate for each plant, which is handy if you’re growing different types of crops in the same setup. It’s also efficient with water and nutrients.
Watch out for: Drip emitters can get clogged, particularly if you’re using organic nutrients. If a line clogs and you don’t notice, the affected plant won’t get water. Regular inspection of your drip lines is a must.
Difficulty level: Intermediate to advanced, depending on the size and complexity of your setup.
7. Aeroponics
Aeroponics is the high-performance sports car of the hydroponic world. It produces incredible growth rates and is extremely efficient with water and nutrients, but it’s also the most technically demanding system on this list.
How it works: Plant roots are suspended in the air inside a closed chamber. Misting nozzles spray a fine mist of nutrient solution onto the roots at regular intervals. Because the roots are exposed to air most of the time, they get maximum oxygen, which drives fast nutrient absorption and rapid growth.
Best for: Virtually any crop, though it’s especially popular for leafy greens, herbs, and in vertical farming operations.
Why people like it: Aeroponics can use up to 50 percent less water than other hydroponic methods. The growth rates are impressive, and the system takes up very little space, especially in vertical configurations.
Watch out for: This system is entirely dependent on electricity. If the misting system stops, roots dry out fast. Nozzles can clog and need regular maintenance. Setup costs are higher, and there’s a steeper learning curve.
Difficulty level: Advanced.
So, Which System Should You Start With?
If you’re brand new to hydroponics, here’s the honest advice: start simple. You don’t need the fanciest system to grow amazing food at home.
For absolute beginners, the Kratky method or a basic Deep Water Culture setup is the way to go. Both are inexpensive, easy to build, and very forgiving while you learn the ropes. You can literally have a working system up and running in an afternoon for less than $20.
Once you’re comfortable managing nutrient levels and pH (which is easier than it sounds), you can graduate to something like NFT or ebb and flow. These give you more flexibility and better results with a wider range of crops.
Aeroponics and large-scale drip systems are best reserved for when you’ve got some experience under your belt and you’re ready for a bigger challenge.
Best for absolute beginners: Kratky method, wick system, or DWC. Low cost, low maintenance, and very forgiving.
Best for intermediate growers: NFT or ebb and flow. More versatile, better for larger plants, and still manageable without expert-level knowledge.
Best for advanced growers: Aeroponics or large-scale drip systems. High performance, but they demand more attention and investment.
Tips to Set Yourself Up for Success
No matter which system you choose, a few things stay the same across the board.
Keep your pH in check. Most hydroponic plants thrive with a pH between 5.5 and 6.5. Pick up a cheap pH testing kit or digital pen and check regularly. This is probably the single most important habit to develop.
Start with easy crops. Lettuce, basil, and spinach are some of the most forgiving plants for hydroponic growing. They grow fast, they don’t need much, and they’ll give you confidence before you move on to tomatoes or peppers.
Use good light. If you’re growing indoors, LED grow lights are the go-to choice. They’re energy-efficient, they don’t run hot, and many offer a full spectrum that works well for both leafy greens and fruiting plants. Most greens need around 14 to 16 hours of light per day.
Clean your system regularly. Every one to two weeks, give your reservoir and system components a good cleaning. A bit of food-safe hydrogen peroxide or diluted bleach (followed by a thorough rinse) goes a long way toward preventing algae and root diseases.
Don’t go too big, too fast. It’s tempting to build an elaborate setup right away, but growing one bucket of lettuce successfully teaches you more than failing with a greenhouse full of tomatoes. Start small, learn the fundamentals, and scale up as your confidence grows.
Frequently Asked Questions
Q: What is the easiest hydroponic system for a complete beginner?
The Kratky method is about as simple as it gets. You just need a container, some water, a nutrient solution, and a net pot. There’s no electricity, no pump, and almost no maintenance. Deep Water Culture is a close second and only requires adding an air pump and air stone to a similar setup.
Q: How much does it cost to start a hydroponic garden at home?
You can build a basic Kratky or DWC system for under $20 using a bucket, a net pot, an air pump (for DWC), and some hydroponic nutrients. Pre-made starter kits range from around $50 to $150, depending on the system type and size. More advanced setups like aeroponics can run several hundred dollars or more.
Q: What plants grow best in hydroponic systems?
Leafy greens (lettuce, spinach, kale) and herbs (basil, mint, cilantro) are the easiest and most popular choices for beginners. Once you’re more experienced, you can grow tomatoes, peppers, cucumbers, strawberries, and many other crops. Root vegetables like carrots and potatoes are generally not ideal for hydroponics due to the space their roots need.
Q: Do hydroponic plants grow faster than plants in soil?
Yes, in most cases. Because nutrients are delivered directly to the roots and plants don’t have to expend energy searching for food in soil, hydroponic plants often grow 30 to 50 percent faster. The controlled environment also reduces stress from pests, weeds, and inconsistent watering.
Q: Can I grow hydroponically without electricity?
Absolutely. The Kratky method uses zero electricity. Wick systems are also fully passive and don’t require any power. These are great options if you want to keep things simple or if you’re in a location where reliable electricity is a concern.
Q: How often do I need to change the nutrient solution?
For most systems with a reservoir, plan to change out the nutrient solution every one to two weeks. This prevents nutrient imbalances and keeps harmful bacteria in check. Always change the solution if it starts to look cloudy or smell off.
Q: What’s the difference between hydroponics and aeroponics?
Aeroponics is technically a type of hydroponics. The difference is in how nutrients reach the roots. In most hydroponic systems, roots are either submerged in or regularly flooded with nutrient solution. In aeroponics, roots hang in the air and are misted with a fine spray of nutrients. This gives roots more oxygen and can speed up growth, but it’s more complex and expensive to set up.
Q: Is hydroponic food safe to eat?
Yes. Hydroponic produce is just as safe and nutritious as soil-grown food. In some cases, it can be even cleaner because you’re controlling the growing environment and eliminating soil-borne pathogens and pesticides. Hydroponic farming has been used for commercial food production for decades.
Q: Do I need grow lights for indoor hydroponics?
If your plants aren’t getting enough natural sunlight (at least 6 to 8 hours of direct light for most crops), then yes, you’ll need grow lights. LED grow lights are the most popular choice because they’re efficient and don’t generate a lot of heat. Most leafy greens do best with 14 to 16 hours of light per day.
Q: Can I use regular fertilizer in a hydroponic system?
It’s not recommended. Regular garden fertilizers are designed for soil and often don’t contain the right balance of micronutrients for hydroponic growing. Use a fertilizer specifically formulated for hydroponics. These are usually available or dry powder mixes and contain the full range of macro and micronutrients your plants need.